Showing posts with label sculpture and jewelry. Show all posts
Showing posts with label sculpture and jewelry. Show all posts
Monday, December 3, 2012
Monday, November 12, 2012

Thursday, October 4, 2012
Papier Mache

Wednesday, October 3, 2012
paper mache


Monday, September 10, 2012

Wednesday, September 5, 2012

Tuesday, September 4, 2012
Welcome back!

Thursday, December 8, 2011

Thursday, December 1, 2011
Tuesday, November 29, 2011
Wednesday, November 2, 2011
Beaded necklaces
Our new project is definitely inspired by one of my favorite modern day artists. Elsa Mora. Her work and style reminds me very much of my favorite artist Frida Kahlo.
Here is your challenge:
1.Create at least one medalion that has a minimum of 5 rings. Don't let each ring be the same width. Use some of them as borders. (I'll clariy this in class)
2. Even if the example isn't something that is your style, think about how you could make it your style or how you could style it for someone else? We don't want to rip off this artist's idea, but instead be inspired to make something our own.
Today in class you'll get colored pencils and paper to plan your design.
Here is some additional inspiration:


Mandalas are often used for meditation or spiritual rituals. Here is a coloring sheet if you're interested.
I also think this project could be very inspired by Native American beadwork and design.


Monday, October 3, 2011
Planning day for mask making


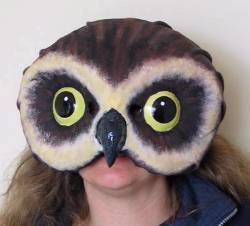

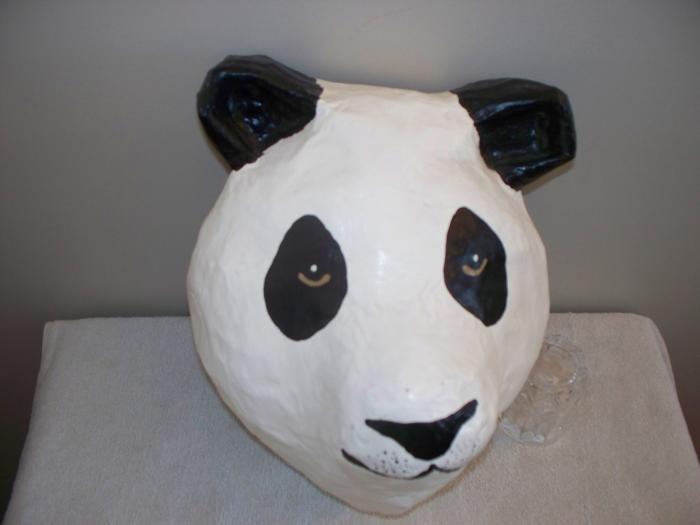
Today you should start drawing out what you would like to make for our mask making unit. No areas should be flat. I'll do a demonstration showing how to make things 3D.
Please turn in your bowls today
Please fill out an evaluation project for your magazine bowl today. You will need to self evaluate, as well as have it evaluated by a classmate.
At least 100 rolls of tightly wound paper were used in creating my sculpture
The sculpture feels strong and securely built
There are no glue strings visible.
Good use of time, effort and attention to detail.
Friday, September 30, 2011
Wednesday, September 28, 2011
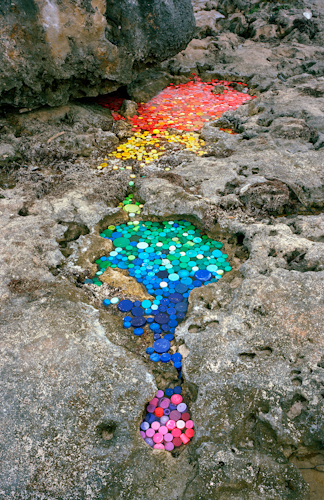
Art Installations for Participation Points

These Surrounded Islands were completed in 1983 near Miami Beach. The 11 islands were surrounded with 6.5 million square feet of floating pink woven polypropylene fabric covering the surface of the water and extending out 200 feet) from each island into the bay. The fabric was sewn into 79 patterns to follow the contours of the 11 islands.
For 2 years prior to the installation marine and land crews picked up debris from the eleven islands, putting refuse in bags and carting it away after they had removed some forty tons of varied garbage that included refrigerator doors, tires, kitchen sinks, mattresses and an abandoned boat.
On May 4, 1983, out of a total work force of 430, the unfurling crew began to blossom the pink fabric. Surrounded Islands was tended day and night by 120 monitors in inflatable boats. Surrounded Islands was a work of art underlining the various elements and ways in which the people of Miami live, between land and water.
The outer edge of the floating fabric was attached to a 12 inch diameter octagonal boom, in sections, of the same color as the fabric. The boom was connected to the radial anchor lines which extended from the anchors at the island to the 610 specially made anchors, spaced at 50 foot intervals, 250 feet beyond the perimeter of each island, driven into the limestone at the bottom of the bay. Earth anchors were driven into the land, near the foot of the trees, to secure the inland edge of the fabric, covering the surface of the beach and disappearing under the vegetation. The floating rafts of fabric and booms, varying from 12 to 22 feet in width and from 400 to 600 feet in length were towed through the bay to each island. There were eleven islands, but on two occasions, two islands were surrounded together as one configuration.
As with Christo and Jeanne-Claude's previous art projects, Surrounded Islands was entirely financed by the artists, through the sale of preparatory drawings, collages, and early works. The artists do not accept sponsorship of any kind.
For two weeks, Surrounded Islands, spreading over 7 miles (11.3 kilometers), was seen, approached and enjoyed by the public, from the causeways, the land, the water and the air. The luminous pink color of the shiny fabric was in harmony with the tropical vegetation of the uninhabited verdant islands, the light of the Miami sky and the colors of the shallow waters of Biscayne Bay.


This week several of our students will be creating art installations at Irondale. Our purpose is to draw attention to structures in the building that are not typically seen. Our vehicle will be yarn bombing.
Monday, September 19, 2011
Just keep rolling, rolling, rolling...

Have you decided that you just love rolling paper? This map idea might be for you.
This week we'll use hot glue to start building up the sides of your bowl. I would say aim for around 100 coils to make an awesome looking bowl. It's easy to use too much hot glue and have a stringy mess. All glue strings can be removed when you're done, but neatness now will save you time later.
Monday, September 12, 2011
Tuesday, September 6, 2011
Welcome Back!
Welcome Back to Irondale!
To do today:
1. Go over syllabus.
2. Assign seating charts.
3. Get to know each other game:
*get a notecard and DON'T put your name on it.
*write these 4 things on it
-favorite color
-favorite food
-best place to hang out
-this year I want to...
*I'll collect cards and pass them back out randomly.
*Interview people until you find out whose card you have. Write their name on the back and KEEP IT.
*Introduce your new friend to the class.
4. Start passing out supplies and putting them in your bins.
Leather Wrap Bracelets Evaluation
Evaluation for Leather-Wrap Bracelet
* The finished project can wrap around your wrist at least twice.
0 1 2 3 4 5 6 7 8 9 10
* The beads fit snugly between the leather cords without extra fishing line hanging.
0 1 2 3 4 5 6 7 8 9 10
* All knots are tied tightly and finished with a dot of clear polish.
0 1 2 3 4 5 6 7 8 9 10
* This piece feels like it will hold up well to lots of wear.
0 1 2 3 4 5 6 7 8 9 10
* Each bead wraps around the cord on both sides.
0 1 2 3 4 5 6 7 8 9 10
* The closure on this piece looks is neat and secure.
0 1 2 3 4 5 6 7 8 9 10
Leather Wrap Bracelets

Leather-Wrap Bracelet
Materials:
Round leather cord: we will use 1 yard of any color
Beading thread: we are basically using fishing line! I suggest taking about 4 feet at a time and then you’ll tie it off when you run out and tie on another 2 feet length.
Beads: for this assignment we’ll be using glass seed beads in a variety of colors. Make a pattern, or don’t, it’s up to you. If you try this again on your own, use whatever size and color you would like - just match them up in weight to the size of the lace you are using. You must be able to thread the beading thread twice through each bead. Wouldn’t it be cool to use nuts from the hardware store to give it a different look?
1. Double the cord and tie a knot with an opening that is bigger than a pencil eraser and smaller than a crayola marker. Now tie another knot next to it with the same sized opening. When a bead joins with one of these loops, it will make a closure for your bracelet.
2. Tie (double knot and pull tight ly with your teeth) the fishing line on the left side of the cord. (It doesn’t really matter which side, except that when you’re learning it’s easier if we all do it the same way)
3. Tape the top loop onto your table with your fishing line tied to the left side.
4. Bring the fishing line under the leather cord and add a bead. Slide the bead so it is snug against the cord. Loop the thread over the other leather cord and come back under it and back through the bead. You are making a figure 8 with the fishing line, with the line going through the bead twice in the middle.
5. Loop the thread over the first leather cord and add another bead, looping the thread and going back through the bead as before. Snug up each bead as you go, keeping the leather lace just enough apart to accommodate the beads.
6. Continue on until you reach the length you determined at the beginning. Tie (double knot)off the beading thread to one of the laces as you did in the beginning, but don’t cut it off.
7. DOUBLE DRILL your bead and slide it on both leather cords and the fishing line. Cut the fishing line short enough so that it is hidden inside the bead.
8. Tie a double knot (tighten with your teeth) and cut the remaining leather about ¼ inch long.
9. Put a TINY bit of clear fingernail polish on any knots that are visible.
10. Done! Evaluate your work and turn it in!
Subscribe to:
Posts (Atom)