Wednesday, June 5, 2013

Day 4 of animated GIF

Day 4 Animated Gif

  • open your finalname.psd document and make sure all of your layers are there:  you should at least have a1, a2, a3, b1, b2, b3, c1, c2, c3, and a blank background.  
  • In the layer stack highlight all of the layers.
  • Go to window and select animation
  • Toward the bottom of the page there is an arrow: select make frames from layers
  • Highlight the blank background in the layer stack.
  • Click the arrow again and select match layer across frames and hit OK
  • Go down to the animation reel and click on the blank background, and drag it to the trash.  
  • Change the time under each frame-- I usually choose the .2.
  • Go to file and save for web and devices. Make sure GIF is selected when you get the chance.  
  • Make sure this is saved as finalname.gif and drag it to the dropbox.  

    DONE!!!

Monday, June 3, 2013

Day 3 animated GIF

Day 3 Animated Gif

  • Open your BOTH your work document and your final document.  
  • In the work document, close the eye in the layer stack on all your layers EXCEPT for A and 1.
  • Go to the Layers tab at the top of the Photoshop Menu and select it. Scroll down until “Flatten Image” appears and select it. It will ask you “Discard Hidden Layers?” and click OK. The layer stack will only have 1 layer, which is the combination layer of A & 1.
  • You need to duplicate this layer to your Final.Last Name document using the same process from earlier. Make sure this layer is selected in the layer stack, right click anywhere in the blue area and select Duplicate Layer…rename it “A1” destination final.name...
  • Go to window (in your work file) and click on history.   Pull it down, so you can see all that you’ve done today.  
  • In Your Work.Last Name Document, Locate you History Window and click above “Flatten Image” – this will bring back all of your layers.
  • Now, close all eyes except for A and 2.
  • Go to the Layers tab at the top of the Photoshop Menu and select it. Scroll down until “Flatten Image” appears and select it. It will ask you “Discard Hidden Layers?” and click OK. The layer stack will only have 1 layer, which is the combination layer of A & 2.
  • You need to duplicate this layer to your Final.Last Name document using the same process from earlier. Make sure this layer is selected in the layer stack, right click anywhere in the blue area and select Duplicate Layer…rename it “A2” destination final.name...
  • Go to window (in your work file) and click on history.   Pull it down, so you can see all that you’ve done today.
  • In Your Work.Last Name Document, Locate you History Window and click above “Flatten Image” – this will bring back all of your layers.
***If you want to see your progress, select your Final.Last Name document and make sure that you have a 3 layers in the Layer Stack (window): Background, A1, & A2.
  • Now, close all eyes except for A and 3.
  • Go to the Layers tab at the top of the Photoshop Menu and select it. Scroll down until “Flatten Image” appears and select it. It will ask you “Discard Hidden Layers?” and click OK. The layer stack will only have 1 layer, which is the combination layer of A & 3.
  • You need to duplicate this layer to your Final.Last Name document using the same process from earlier. Make sure this layer is selected in the layer stack, right click anywhere in the blue area and select Duplicate Layer…rename it “A3” destination final.name...
  • Go to window (in your work file) and click on history.   Pull it down, so you can see all that you’ve done today.
  • In Your Work.Last Name Document, Locate you History Window and click above “Flatten Image” – this will bring back all of your layers.
  • Now, close all eyes except for B and 1.
  • Go to the Layers tab at the top of the Photoshop Menu and select it. Scroll down until “Flatten Image” appears and select it. It will ask you “Discard Hidden Layers?” and click OK. The layer stack will only have 1 layer, which is the combination layer of B and 1.
  • You need to duplicate this layer to your Final.Last Name document using the same process from earlier. Make sure this layer is selected in the layer stack, right click anywhere in the blue area and select Duplicate Layer…rename it “B1” destination final.name...
  • Go to window (in your work file) and click on history.   Pull it down, so you can see all that you’ve done today.
  • In Your Work.Last Name Document, Locate you History Window and click above “Flatten Image” – this will bring back all of your layers.
  • Now, close all eyes except for B and 2.
  • Go to the Layers tab at the top of the Photoshop Menu and select it. Scroll down until “Flatten Image” appears and select it. It will ask you “Discard Hidden Layers?” and click OK. The layer stack will only have 1 layer, which is the combination layer of B and 2.
  • You need to duplicate this layer to your Final.Last Name document using the same process from earlier. Make sure this layer is selected in the layer stack, right click anywhere in the blue area and select Duplicate Layer…rename it “B2” destination final.name...
  • Go to window (in your work file) and click on history.   Pull it down, so you can see all that you’ve done today.
  • In Your Work.Last Name Document, Locate you History Window and click above “Flatten Image” – this will bring back all of your layers.
***If you want to see your progress, select your Final.Last Name document and make sure that you have a 3 layers in the Layer Stack (window): Background, A1, A2, A3, B1, and B2
  • Now, close all eyes except for B and 3.
  • Go to the Layers tab at the top of the Photoshop Menu and select it. Scroll down until “Flatten Image” appears and select it. It will ask you “Discard Hidden Layers?” and click OK. The layer stack will only have 1 layer, which is the combination layer of B and 3.
  • You need to duplicate this layer to your Final.Last Name document using the same process from earlier. Make sure this layer is selected in the layer stack, right click anywhere in the blue area and select Duplicate Layer…rename it “B3” destination final.name...
  • Go to window (in your work file) and click on history.   Pull it down, so you can see all that you’ve done today.
  • In Your Work.Last Name Document, Locate you History Window and click above “Flatten Image” – this will bring back all of your layers.
  • You will have to combine ALL the Backgrounds and ALL the Images to end up with 9 total layer combinations in the Final.Last Name document.  – this is the document where the ANIMATION will occur.
  • Now it’s time to do C1, C2, and C3.  Don’t forget---In Your Work.Last Name Document, Locate you History Window and click above “Flatten Image” – this will bring back all of your layers.
Saving:
  • Make sure you’re in the work.yourname file and go to file, save as.  Click on My Computer, so you can see your student file with your number.  See me if you don’t see that number.  Double click your number.  Make sure you’re in format Photoshop (PSD) and hit save.
  • Make sure you’re in the final.yourname file and go to file, save as.  Click on My Computer, so you can see your student file with your number.  See me if you don’t see that number.  Double click your number.  Make sure you’re in format Photoshop (PSD) and hit save.
You’re done for the day!

jewelry making!

This week we'll be stamping metal pendants, cutting out the metal with a jeweler saw, filing the edges, and polishing them on the buffer.


Thursday, May 30, 2013

Day 2 Animated GIF

Day 2 Animated Gif

  • Find your work.psd document in your student folder.  Double click it.  
  • You should have 3 different layers in your layer stack:  Background (should be blank), A, and 1.
  • Right click on layer A and duplicate layer.  Keep it in this work document, and rename it B.  click Ok
  • Right click on layer 1 and duplicate layer.  Keep it in this work document, and rename it 2.  click Ok
  • You should have 5 different layers in your layer stack:  Background (should be blank), A, and 1, B and 2.
  • DO NOT DO ANYTHING TO EITHER LAYERS A OR 1
  • Layer B and layer 2 both need to be altered.  
  • Click on Layer B and go to edit.  Select PUPPET WARP.  When you click on something, it tacks everything down.  Tack down at least 5 spots.  Now, click and slightly drag one or two of your tacks to move it.  DON’T MOVE IT VERY FAR.  Click on the move tool (top tool) and it will ask if you want to apply.  click OK.  
  • Click on Layer 2 and go to edit.  Select PUPPET WARP.  When you click on something, it tacks everything down.  Tack down at least 5 spots.  Now, click and slightly drag one or two of your tacks to move it.  DON’T MOVE IT VERY FAR.  Click on the move tool (top tool) and it will ask if you want to apply.  click OK.
  • Right click on layer B and duplicate layer.  Keep it in this work document, and rename it C.  click Ok
  • Right click on layer 2 and duplicate layer.  Keep it in this work document, and rename it 3.  click Ok
  • You should now have 7 different layers in your layer stack:  Background (should be blank), A, and 1, B and 2 and C and 3.  
  • Click on Layer C and go to edit.  Select PUPPET WARP.  When you click on something, it tacks everything down.  Tack down at least 5 spots.  Now, click and slightly drag one or two of your tacks to move it.  DON’T MOVE IT VERY FAR.  Click on the move tool (top tool) and it will ask if you want to apply.  click OK.
  • Click on Layer 3 and go to edit.  Select PUPPET WARP.  When you click on something, it tacks everything down.  Tack down at least 5 spots.  Now, click and slightly drag one or two of your tacks to move it.  DON’T MOVE IT VERY FAR.  Click on the move tool (top tool) and it will ask if you want to apply.  click OK.
  • You can stop here if you’d like to... otherwise continue on with layers D and 4, E and 5, etc.  
Saving:
  • Make sure you’re in the work.yourname file and go to file, save as.  Click on My Computer, so you can see your student file with your number.  See me if you don’t see that number.  Double click your number.  Make sure you’re in format Photoshop (PSD) and hit save.
  • Make sure you’re in the final.yourname file and go to file, save as.  Click on My Computer, so you can see your student file with your number.  See me if you don’t see that number.  Double click your number.  Make sure you’re in format Photoshop (PSD) and hit save.
You’re done for the day!

Thursday, May 23, 2013

1st day animated GIFs

Now that you've completed 2 sheets of paper:  one with your main character and one with a full page background, you're going to start working on them in photoshop.

Day 1 on animated GIFs

Log onto your student server.  You must be logged in.  If you can’t, see me. 

  • Find your background and your character in the student shared folder, in the pick up box, cannonj, cartooning 2013.  Drag them both to the desktop. 
  • Double click on photoshop.
  • Go to file and click on new.  Name that file “work.yourname” and set the width to 540 pixels and the height to 640 pixels, and the resolution to 200.  Don’t change anything else.  Hit OK. 
  • Go to file and click on new.  Name that file “final.yourname” and set the width to 540 pixels and the height to 640 pixels, and the resolution to 200.  Don’t change anything else.  Hit OK.
  • Go to file and click on open.   Select your background 
  • Go to the layers (near channels and paths on the right) and right click, then select duplicate layer.  Rename it A and click on the drop down menu to select work.yourname.  Click Ok. 
  • Go to file and click on open.   Select your main image. 
  • Go to the layers (near channels and paths on the right) and right click, then select duplicate layer.  Rename it 1 and click on the drop down menu to select work.yourname.  Click Ok.
  • Scale 1(your main image) to fit your background by selecting the move tool. (The top tool that looks like a fancy plus sign) Hit control T  and then  hold shift as you drag your image so that it’s the right size for your background. 

Saving:
  • Make sure you’re in the work.yourname file and go to file, save as.  Click on My Computer, so you can see your student file with your number.  See me if you don’t see that number.  Double click your number.  Make sure you’re in format Photoshop (PSD) and hit save. 
  • Make sure you’re in the final.yourname file and go to file, save as.  Click on My Computer, so you can see your student file with your number.  See me if you don’t see that number.  Double click your number.  Make sure you’re in format Photoshop (PSD) and hit save. 

You’re done for the day. 


Tuesday, May 21, 2013

Animate your "Scribbles"


I'm so crazy for the work of Dain Fagerholm. There are many, many animated gifs online, and I think his hand-drawn look is really exciting to look at. Today I want you to take one of your characters and practice "scribble-shading" with a ballpoint pen. Please fill a full sheet of paper. Do not work on the background yet.

1.  Sketch out your character on a full sheet of paper with a pencil
2.  Start "scribbling" on your design.  The more scribbles in one area the darker it will be, the few scribbles the lighter it'll be.  Duh, huh?  


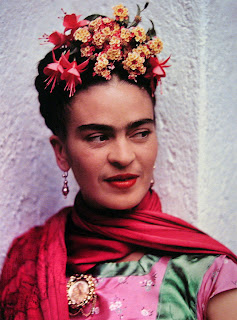
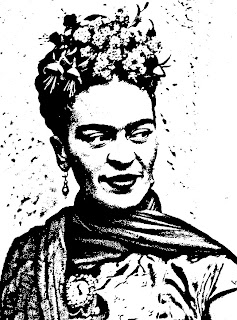
We're working on painting people we admire in Art I right now. Students found photos and then ran them through the program at phixr.com. Once the students have manipulated their picture, they trace it on a piece of watercolor paper. The rest of the tutorial is here. These are due on Thursday, May 23rd.

Here's a really cool video using many of the techniques used for this painting assignment!

Thursday, May 16, 2013

Flatting and coloring your character

You'll be using photoshop through Friday to color your character.  Here is the evaluation sheet for the assignment...

Character is carefully drawn and inked with a variety of widths.
0-10
There are 2 separate layers showing:  line art and colors
0-10
All coloring is done on the color layer and stays right on top of the black line.
0-10
Multiple values of color are used to show shades and highlights
0-10
An effort to be neat, thorough and creative shows in your work.
0-10
Work is turned in on time used time in class wisely.
0-10

Total==60 points

Phixr


Today you'll choose a photo of a person that you admire off of the internet.  It (of course) needs to be school appropriate.  You will alter it using phixr.com.  You need to be logged in to your student server in order to save your work in the drop box.  

To change your photo into a high contrast black and white photo:
www.phixr.com
·       Click on the green “get started” arrow
·       Click “no thanks, skip this
·       Click the gray “browse” button
·       Look in the desktop, click on your file and hit open
·       Click on  “upload the chosen photo to phixr
·       Click on the sharpen tool and then click the unsharp mask button
·       Click on the color effects tool, and on the pull-down click on “two color” and you can play around with the contrast and brightness until you get something that you like. (Mine were brightness=109 and contrast=7) then hit execute
·       Under the download/save tab pull down jpeg under the file format and hit download/save. 
·       Make sure save is selected on the pop-up and click OK
·       Save in the drop box under your hour:
>downloads
>student shared on Mvc1_student_server/stu
>Irondaledropbox
>cannonj
>your hour
>save


Our collaborative Brain...

Today we're working on a collaborative art project.  I'll provide the head and the brain opening and you'll provide the most interesting drawing/shape/design that you possibly can:  given just one hour, one pair of scissors, one post-it note, and one Sharpie marker.

Monday, May 6, 2013

printmaking


Before we start today, we're going to watch a couple of videos on  printmaking.

Inspired by the traditional Tibetan Prayer Flag, we will create a positive wishing flag, which will be carved,printed, and hung by the students.
Here are some traditional flags being flown. A common misconception is that these prayers are being sent to the gods. Instead they are positive wishes that are being shared with the community. We will also be creating positive messages to be shared in much the same way.

First, students will brainstorm ideas for images that communicate a positive wish for either themselves or the world. Students will design a central image for their own flag that represents their wish. Finally they will design a border or frame that surrounds the central image. Students can choose to use all images, but could also add text.

Students will transfer their drawings to linoleum and cut it out based on the safety instructions given in class.

Students will use the printing press to make multiple copies of their wishing flags. (The image that students carve will be reversed when it's printed)

Wednesday, April 17, 2013

Today we made up for our lack of Tutorial Tuesdays, with 2 tutorials.  These should be inked in your sketch books with extra pencil lines erased cleanly.

http://www.youtube.com/watch?v=zGsPO6Fzzr0

http://www.youtube.com/watch?v=CHZLop6fd3o

Friday, April 12, 2013

Intro to Surrealism

We're looking at this...and this...

Monday, April 1, 2013

T-shirt Design


Today we are starting to work on our stenciled t-shirts.  Here is a presentation showing the process!  Click on the T-shirt Freezer Paper Power Point presentation. We will also watch a youtube video that shows the process and do a 10 point worksheet.

Paper Mache Masks

+
Step 1:  Plan your mask (to size) on white copy paper.  
Step 2:  Cut your mask out of thick paper.
Step 3:  shape and add dimension.
Step 4:  tape the entire thing up inside and out
Step 5:  paper mache with newspapers
Step 6:  paper mache with paper towels
repeat steps 5 and 6, then final paper mache with paper bags.
NEXT:  paint and embellish with feathers, beads, etc.  

Grading:

  • Creative/CHALLENGING design that covers no more than 2/3s and no less than 1/2 of your face
  • Eye placement is in the correct spot.
  • Mask is not flat, but has some dimension.
  • paper mache work is smooth and strong with no visible ridges or bumps
  • All of the edges of the mask are smooth, with no stray papers popping up
  • The painting has no underpainting showing and also has crisp edges.
  • The mask has been embellished
  • The mask either has a stick or a string to hold it in place.
  • Overall neatness and presentation
  • Turned in on time and used time management

Tuesday, March 26, 2013

mini-comics

We're watching this today!

Here are the requirements for your mini-comic:

This is your final for the drawing portion of the class.  You'll want to show what you know.  If you don't have to use stick figures, don't.  If you do have to use a simple drawing style, make it as neat and as challenging as you possibly can.
The minimums:  Minimum of 8 pages and 16 panels.
The maximums:  Maximum of 16 pages and infinity panels.  Please keep in mind that each page needs to be readable.  If there are too many panels per page, it can look messy.
1st page:  needs your title, a picture, your name and the year.
No coloring, unless you're using the gray markers.


Sunday, March 10, 2013

Koru Painting Planning

  • .
    A Koru is a curved shape representing a baby fern frond. The Maori culture of New Zealand uses this motif in their artwork.
  • 2.
    The Koru symbolizes new birth and growth. Look at pictures of fern plants ready to unfurl. What shape do the plants make? Compare the ferns to samples of Maori art. Use a colored pencil to practice making Koru on a piece of construction paper.
  • 3.
    To design a Koru painting, use a colored pencil to sketch one large Koru on a piece of construction paper. Draw two smaller Koru on either side of the larger one.

Thursday, March 7, 2013

Jack and Jill Example

Gwen Allen did this wonderful comic about Jack and Jill-- Beautiful work!

Wednesday, February 27, 2013

Shoe Painting

Today you will be planning what you'd like to paint on your shoes.  You should have shoes here by next Monday!

Color Wheel Sculptures


Students have been reviewing primary, secondary and intermediate colors this week and then painting them onto circles.  Today we start cutting them out and making them into 3D star color bursts.  The directions are here.

Mixing the color wheel

Today you will mix the primary colors in order to create all 12 of the colors from the color wheel.

You will need:

paper
a circle to trace 12 x's
paint

Narrative Arc


5 Basics of Story Telling (Narrative Arc)
1. The protagonist: The hero of the story. In order to be the protagonist, we need to have emphathy for the character, the character needs to have motivation and ability.
*Empathy: The reader needs to care about what happens to the protagonist.
*Motivation: The protagonist needs to want something badly enough to do something they wouldn't ordinarily do. This is motivation.
*Ability: The protagonist has to be able to fulfill his desires. If the reader knows that the character can't achieve want they want to, the story will be B-O-R-I-N-G.
2. The Spark might be the most important ingredient in good story telling. This is what can turn a regular character into the protagonist. The spark must be something that wouldn't normally happen in the protagonists life. A good guy fighting the bad guys isn't a good story until there is spark. What if all of a sudden the good guy finds out that his father is the worst of all the bad guys, and he must defeat him. That has spark.
3. Escalation: It wouldn't be an interesting story if the protagonist suddenly solves the problem created by the spark at the beginning of the story. Escalation is a series of unexpected events that make the protagonist work even harder to solve his or her problem.
4. The climax: Ideally, a story will have several attempts to solve a problem. Each of them making the problem a little bit worse. (Escalation) When you hit the climax of the story, the reader says, "Ah, yes, that's it," not "And what's next??" The climax needs to provide an answer for the protagonist, and it doesn't have to be a happy one, but we NEED to know that the story is about to end.
5. The denouement: an action that happens after the climax that ties up loose ends and gives the story some closure. It usually doesn't have anything to do with the protagonist's problem.
Whole Class Activity:
Let's talk about Cinderella...
Who is the protragonist?
What is the spark?
Escalation?
Climax?
Denouement?

Group Presentations:

Use your knowledge of the Simpsons (or some other REALLY well known TV show) and create a new episode. Someone in your group needs to write down your story. Extra credit will be given to the groups that share their story.
Start by picking a protagonist (there are many in this show)
Or start by creating a spark
Or start with the climax
Just remember to escalate conflicts form minor to major.

Monday, February 25, 2013

Tutorial Tuesday

It's Tuesday! We'll first do a tutorial in our sketchbooks and then finish up Jack and Jill.

COLOR!

Check out this video!

Work with the people in your group to create the 12 colors in the color wheel. Put the colors in order to get your points. Have fun!

Next, you'll work on this worksheet...

5-6 panel comics are graded!

Here are one of the many awesome comics turned in for the 5-6 panel comic.  Way to go Julia!

Wednesday, February 20, 2013

Tuesday, February 19, 2013

Value Drawing

We're getting ready to turn in our value drawings on Friday.  I know some of you are getting nervous, so I thought you might like a quick review...  (Notice in the video, he starts with an outline and then hides it within the shading)

Good artwork has:


  • Value
  • Chiaroscuro
  • Crisp edges
  • No outlines (showing)
  • focus (not blurry)

Tutorial Tuesday #4

Today we'll be:

  • working on this tutorial.  If you're not in class, you still need to complete this tutorial in your sketchbook.  
  • Grading your 5-6 panel comic in your grading book.  You'll need to self evaluate and get a peer evaluation.  I should have these graded and on student connect by Friday.

Thursday, February 14, 2013

Inking Inspiration


You always hear me talk about varying the width of your lines to create interest. I think this is an inspiring example that mixes up inking techniques in a very positive way. Is there anything in this example that you could incorporate into your art work?
This is the 5-6 panel comic assignment as completed by Reed Martizna.  Way to go Reed, this is beautiful work!

Tuesday, February 12, 2013

Tutorial Tuesday #3

Today we'll focus our tutorial on drawing male eyes vs. female eyes.  When this is finished you could work on your 5-6 panel comic strip.  (Due on Tuesday)

Heart Art


Heart Art.  Just in time for Valentines Day.  To be caught up, you should have you list of 10 things with pictures, along with a rough draft of a heart with your objects arranged inside.  Before you start on the final copy, you should practice using different value techniques with your objects.  Remember:  NO OUTLINES!